

Disclaimer: This post contains affiliate links. At no cost to you, I will earn a commission if you click through and make a purchase on Amazon.com. All opinions are my own.

I’ve been planning this year’s garden for quite some time and it is finally time to see the first sprouts emerge! I know, you southerners have been at this for a while now, but here in the north it’s our time to shine! I have a shelving and grow light setup for starting seeds that I love and wanted to share. There are so many great ways to start seeds and many options for grow lights. This isn’t the only way, for sure, and you don’t NEED to buy anything fancy. I want to share what I’ve used the last couple of years that has improved my seedling success for those looking to invest in some equipment for themselves, because it took some trial and error to get where I am now.
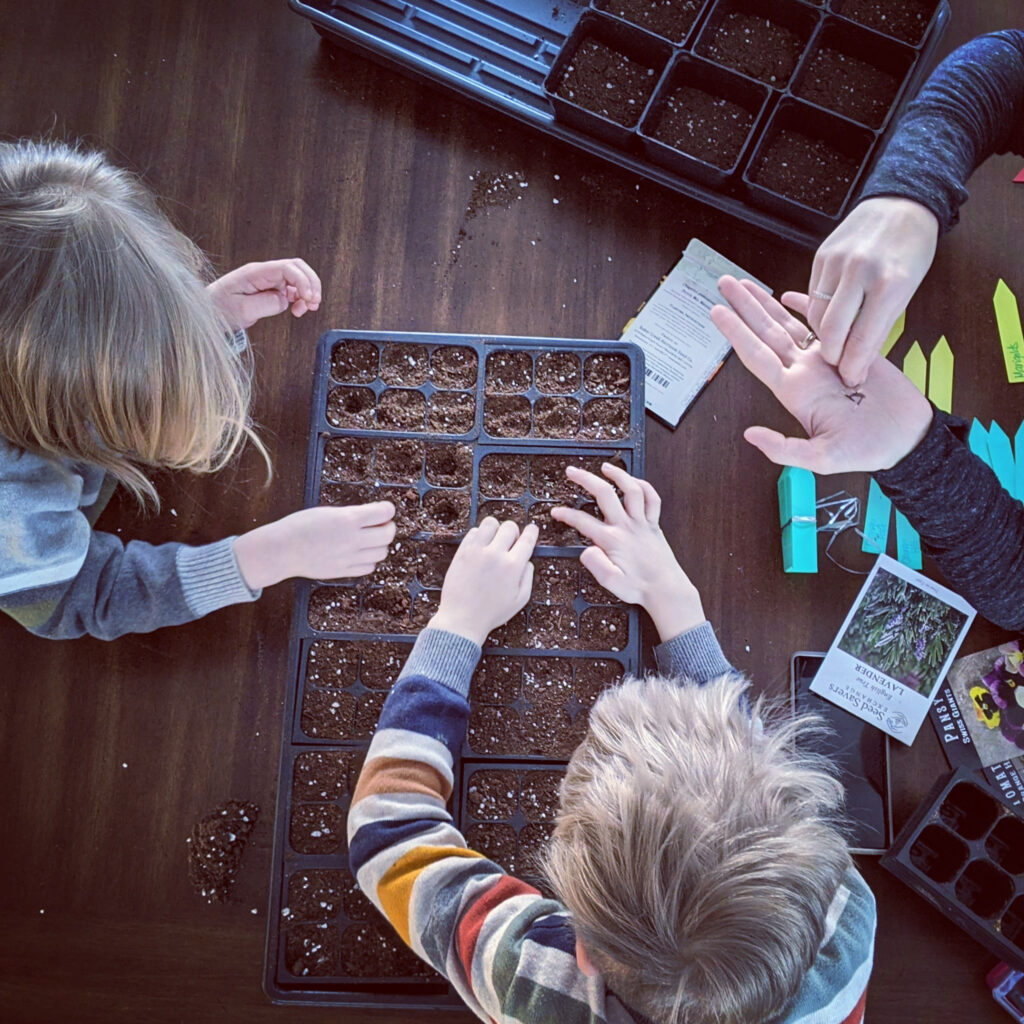
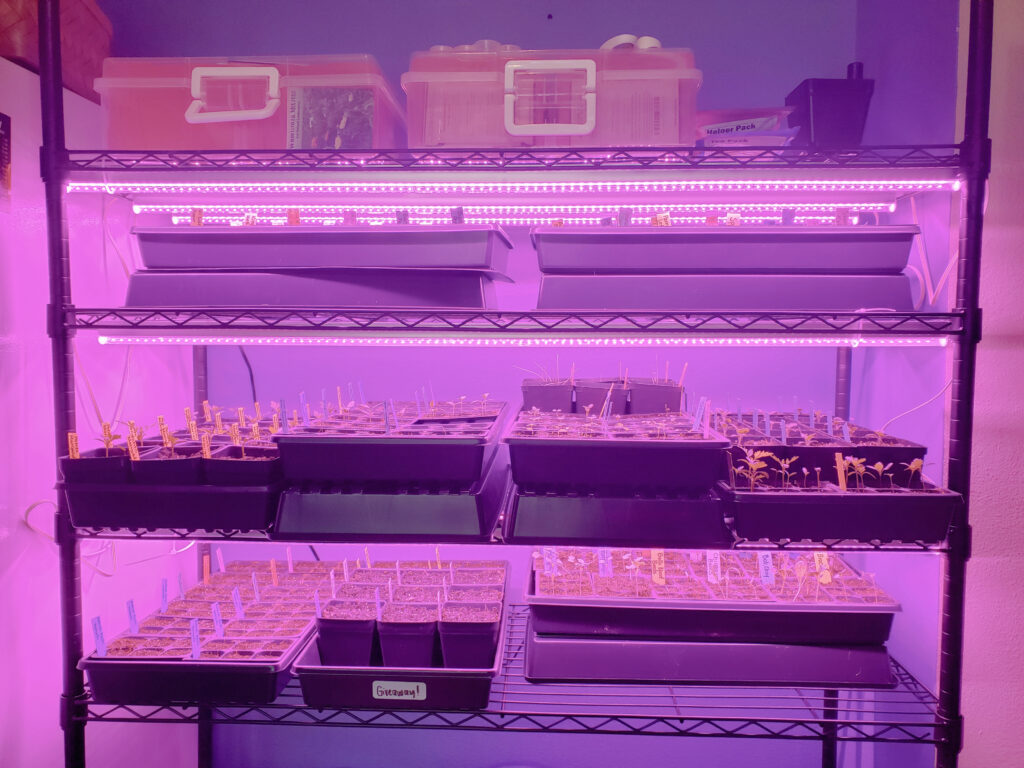
Let’s start with pots, cups, and trays. I use 1″ seedling starter trays to germinate seeds. I purchased mine from Amazon in a pack of 120 trays with 6 cells each. I reuse these and won’t need to purchase more for several years. These 1″ cells hold my seedlings for the first couple weeks of their life. For plants I need to transplant into larger containers, I use 3.5″ pots from Growers Solution. While the price tag on these seems like a lot, I had previously been buying from Amazon at double the price. This box of 450 will last me years, even with selling some at our farm stand plant sale. These are great quality and reusable as well. I have used solo cups in the past, just drill a hole in the bottom and they make great transplant cups. I prefer the square pots because they fit great in 1020 trays, which I also purchased from Growers Solution. These trays are sturdy and I can easily move 18 pots around at a time. I also prefer to bottom water (more on that in a bit) and these make that possible. There are other places to buy these items, but I found that purchasing in bulk was worth the up front investment. If 100 trays or 450 pots seems like too many, find someone to go in on the bulk package. As an example, locally and on Amazon most 1020 trays are flimsy in the $2.50 range, while the bulk purchase puts them at $1.52 each and find these to be sturdier than any I’ve purchased before.
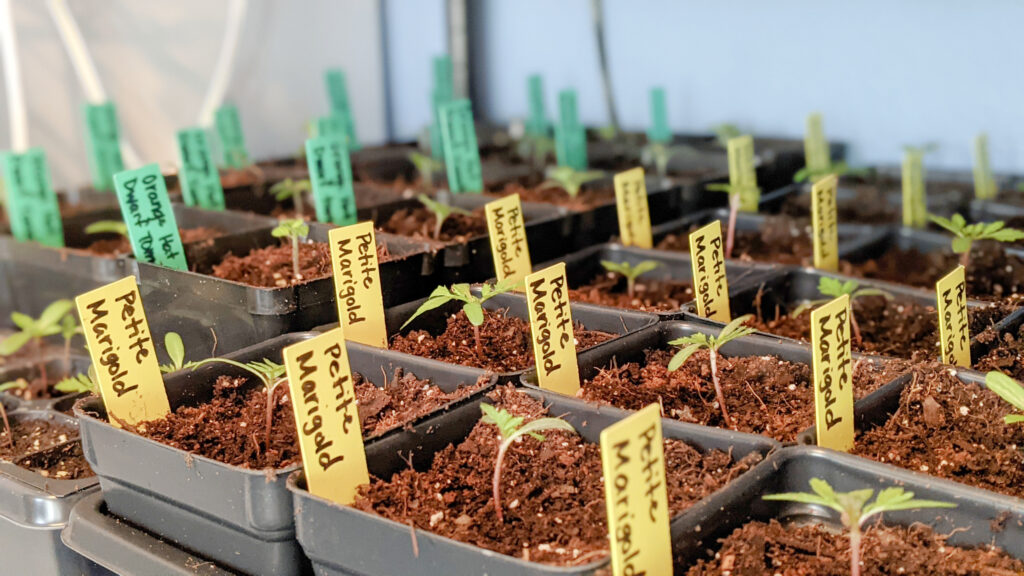
When seed starting, it is important to use a soil that is light enough for seeds to germinate in. I use whatever organic seed starting soil I can find locally. This year I used a Burpee soil made with coconut coir. Seed starting mix can sometimes repel water on the surface, so bottom watering in helpful. If you have a tray under your pots you can fill them with water, give them some time to soak, and then remove the excess from the tray. This will help grow deep roots that reach downward towards the water. The other option is a spray bottle with a light spray that won’t displace small seeds. When it comes time to up-pot into the 3.5″ pots I use an organic potting mix. This can be a heavier soil than the seed starting soil, but garden soil will likely be too dense. Let those roots expand and work through the soil before you transplant them into the garden.
While you can set seedlings in a window to be extra thrifty, I found my starts to be very leggy when I used that method. They were reaching for the light, causing them to get stretched out with thin stems. I also had this problem when I didn’t have enough grow lights to cover my trays. Having enough grow lights and keeping them close to small starts is important. Let your plants grow strong roots and stems first. I found the perfect balance with an adjustable shelf system and 4′ LED grow lights. The shelving I have was purchased from Amazon, but I have seen it elsewhere and even on Amazon it is sold by multiple sellers at all different price points. I hesitate to link this one, because I paid much less than it is currently listed for but you can see the shelves here. (I paid $90 for the 4 shelf version a few weeks ago and $97 for the 6 shelf version last year.) The grow lights are sold in 2′ and 4′ lengths, but the 4′ LED lights sit right in the shelves of the system I linked and stretch all the way across. With small starts I put 3 lights across each shelf and I can fit up to 4 1020 trays on each shelf. Once I have taller plants I can get away with 2 grow lights per shelf. With 6 lights in a pack, that’s a lot of plants!
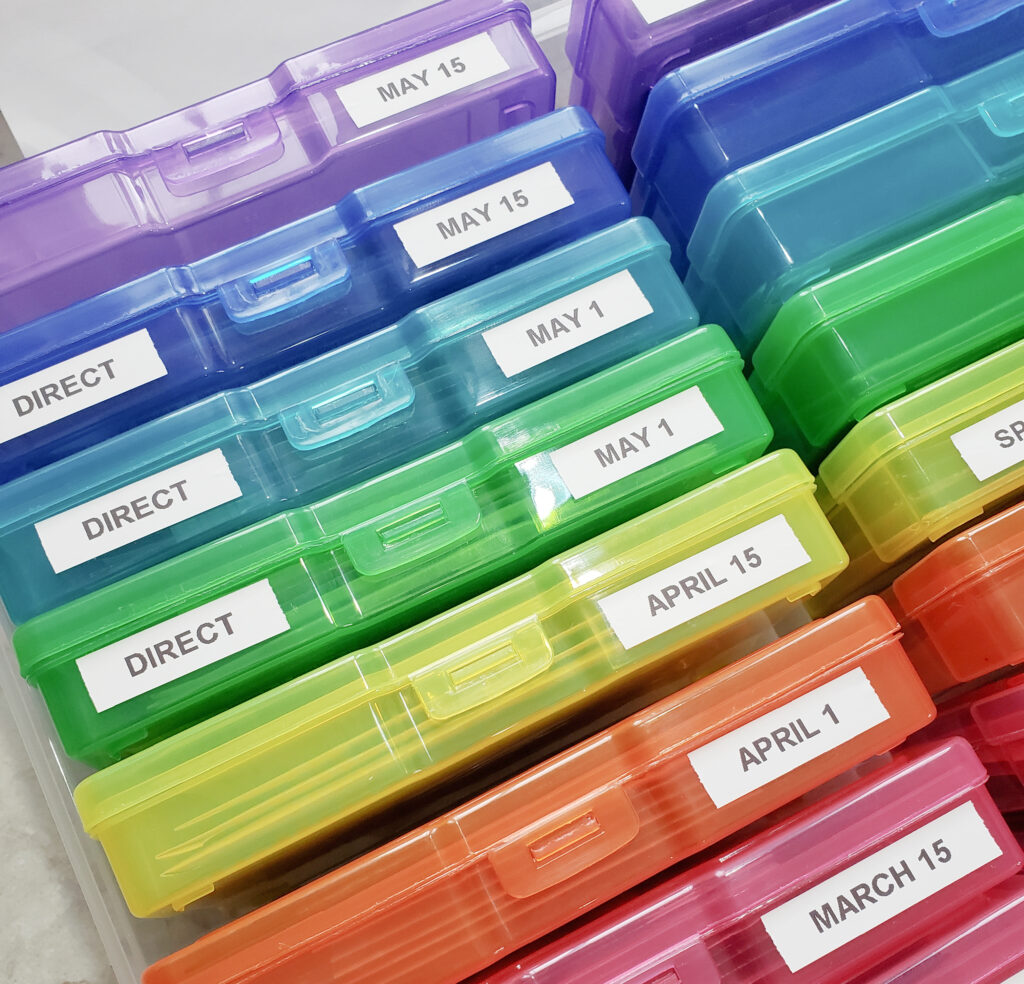
A pack of seeds typically has more than I can grow in a year, especially because I prefer to grow several varieties of the same vegetable. I quickly came to the realization that I needed a seed storage solution. For a couple of years I used 3″ binders with photo pages and it worked great! You can see the front and back of each packet which makes it so easy to plan your seed starting. I outgrew those binders after a few years of buying ALL THE SEEDS and now I have 2 photo organizers from Michaels. I can sort my seeds by type or planting date. When I plan out my garden for the year I use the dated cases and when I’m done planting they go back in the box for their seed type. They are typically on sale for somewhere between $12-$15 and can hold hundreds of packets (I have fit about 15-20 seed packets per case unless it is a large seed like beans). There is also a clear version available, but I love the colors!
There are so many great options for seed starting. Start with what you have (a table or windowsill works great for a small amount of starts) and find what works for you within your budget. I hope these recommendations can help, especially if you are looking to grow to a larger setup. I am always growing as a gardener and learning from experience and love to connect with other gardeners. As always, if you have any questions, feel free to reach out. Come follow along on Instagram and Facebook for all of our homestead happenings.