
I recently saw some metal barn quilt squares for sale and would have brought them straight home, but the price tag made me pause. When driving through farm country, looking at the barns, each with their own square, always makes me smile. I would love to add some to our chicken coops, but first I had to try it out on a small scale. It turns out, this classic pattern is very easy to make with just a few materials and an hour or two.
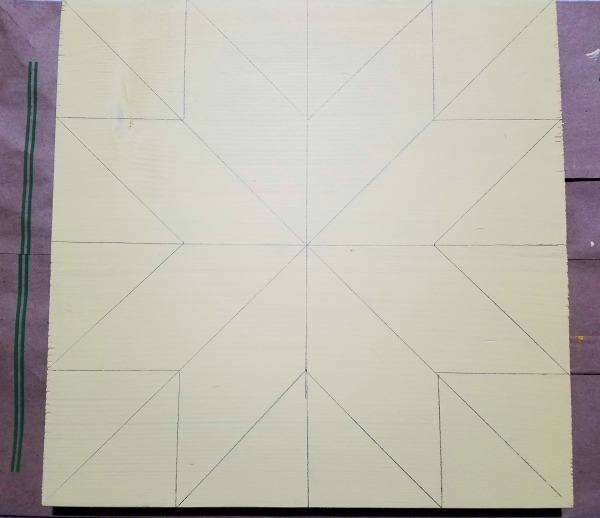
The pattern is just lines and angles split into 4. By making a grid of 4×4 you can easily draw this pattern out. I have made a handy little reference for you in just 4 steps:
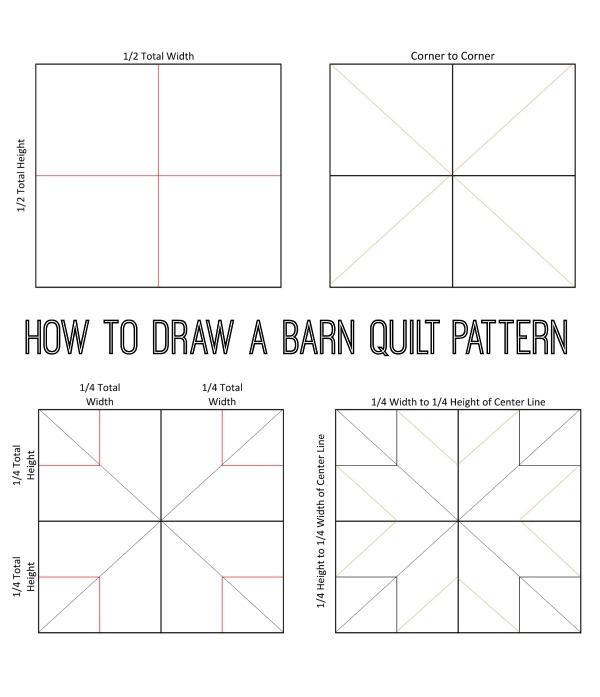
For my square, I used a piece of 3/4″ lumber 12″x12″. This makes it easy to draw out the pattern using markings horizontally and vertically at 3″, 6″, and 9″.
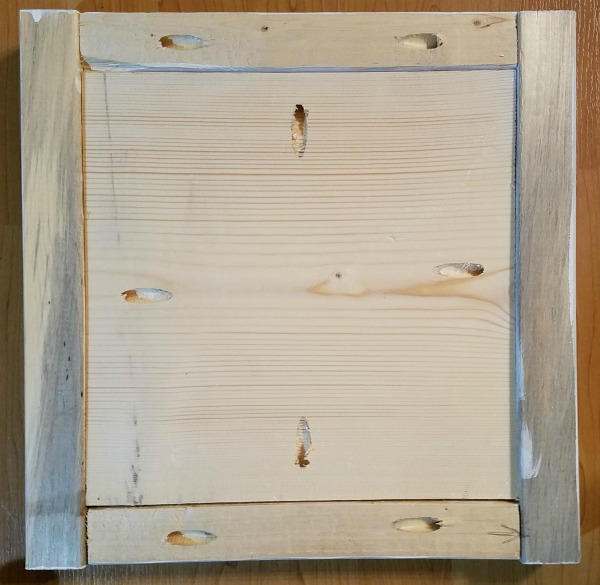
The frame is just 4 pieces of 2×2 (2 of each cut to 12″ and 15″). You don’t need to add a frame, but if you have a finish nailer or pocket hole jig, it is very simple. Once you have your square and frame, add pocket holes to the square with one on each side (but don’t screw together yet).
This will allow you to easily attach the frame one you are finished painting. Remove the square from the frame and paint or stain the frame as you would like. Next, you can paint the square the lightest of the colors you have chosen. In this case, I chose yellow. Allow to dry.
Next, begin marking the square with the pattern you prefer. I used a pencil to show the pattern, but chalk may work better so that it doesn’t show on the completed project. If you chose to use pencil, make sure the darker paint covers the lines.
Begin painting with your second color choice. I began by using painters tape, but it was actually easier to use a straight edged foam brush. This way, you don’t have to worry about paint leaking under tape and you don’t have to wait for wet spots to dry before moving on.
Once the paint is dry, you can simply attach the frame using your pocket hole screws. If you don’t have a pocket hole jig, you can attach the frame using finishing nails. Just fill the nail holes and touch up the paint. It is as simple as that!
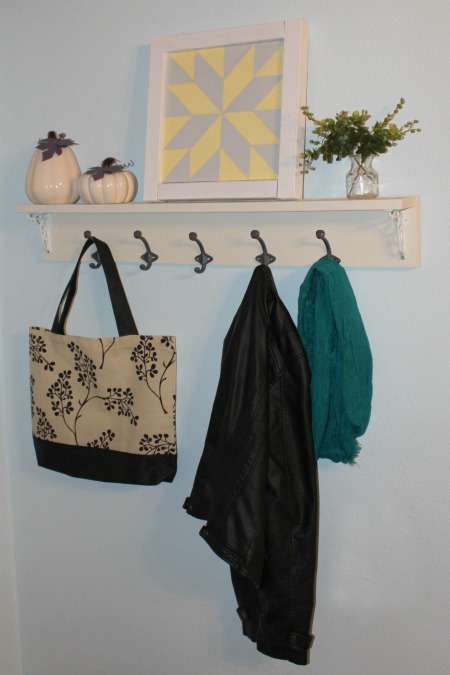
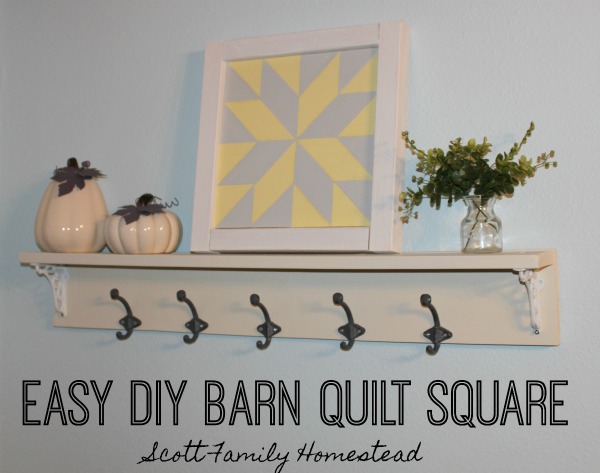
I chose to display it on our new DIY coat rack. Eventually though, I think this will get a twin (maybe with a different pattern) and get hung up in Micah’s nursery. We are planning on adding a bit of a farm theme to his room and this would fit in perfectly.
If you haven’t seen it yet, be sure to check out the kid’s new playroom! After a weekend of hard work, we are so excited to see the final project. Thanks for reading and stay tuned for more!